Note: All installation instructions are all the same as installation instructions for the SureFlap® Dualscan Cat Flap. Whilst we are an independent company from SureFlap®; these installation instructions are based on their instructions with modifications where appropriate to OnlyCat® – shout out to them!
1. Prepare the device
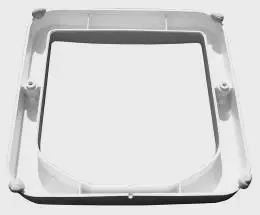
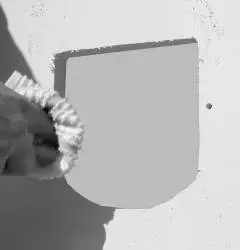
1.1 Place the external frame face down on the floor.
1.2 Attach some Blu Tack (or another similar adhesive putty) to each four corners of the frame.
This should allow the frame to stick to any door.
2. Prepare the area
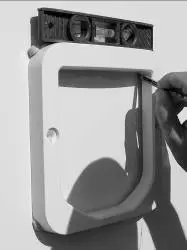
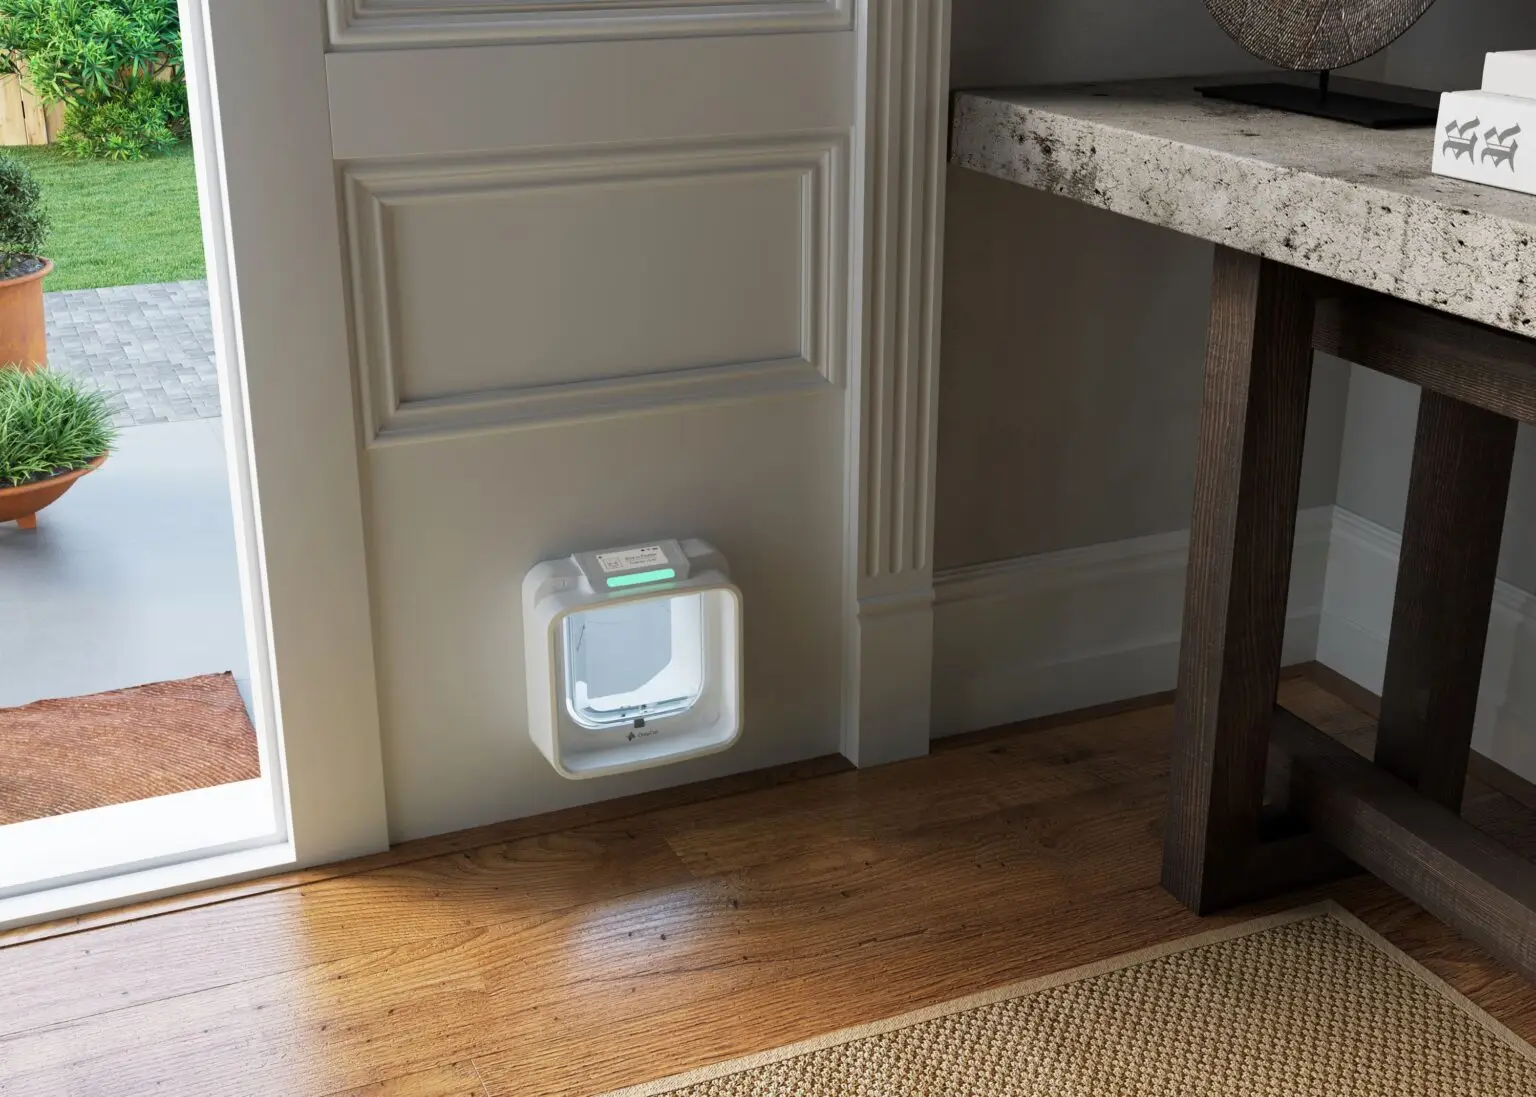
2.1 Choose where you want to mount the cat flap * and stick the frame to the door. We recommend using a spirit level to ensure the frame is level.
* NOTE: The ideal height of the OnlyCat® cat flap is such that the base of the tunnel is the same height as the cat’s stomach. However, in practice the positioning of the cat flap usually depends on the design features of the unit that it will be installed on.
2.2 Use a sharp pencil or pen to mark where the inside of the tunnel touches the door, as well as the two screw holes.
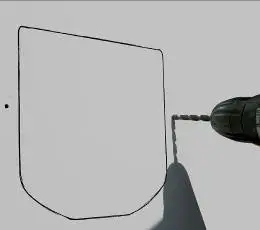
2.3 Remove the frame and ensure you have a solid line where the inside of the frame was, as well as two sharp dots where the screw holes are.
2.4. Using a drill with a 6mm (¼”) diameter bit, drill the two holes for the screws. The holes must be straight to ensure the two halves of the cat flap fit properly.
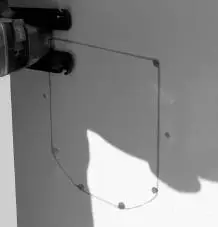
3. Make the hole
3.2 Clean off any loose debris or dirt before installation of the OnlyCat® cat flap.
3.1 Before cutting out the hole for the tunnel, drill holes in the corners large enough to allow your jigsaw blade to fit through. Cut out the hole with an electric jigsaw – ensure you cut 3mm (⅛”) outside the line as you have a hole to allow enough clearance for the tunnel. Make sure that your jigsaw is always lying flat against the door.
4. Mount the device
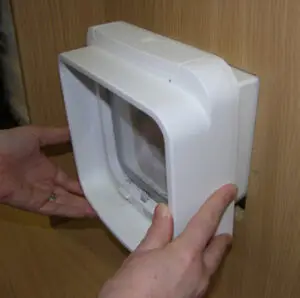
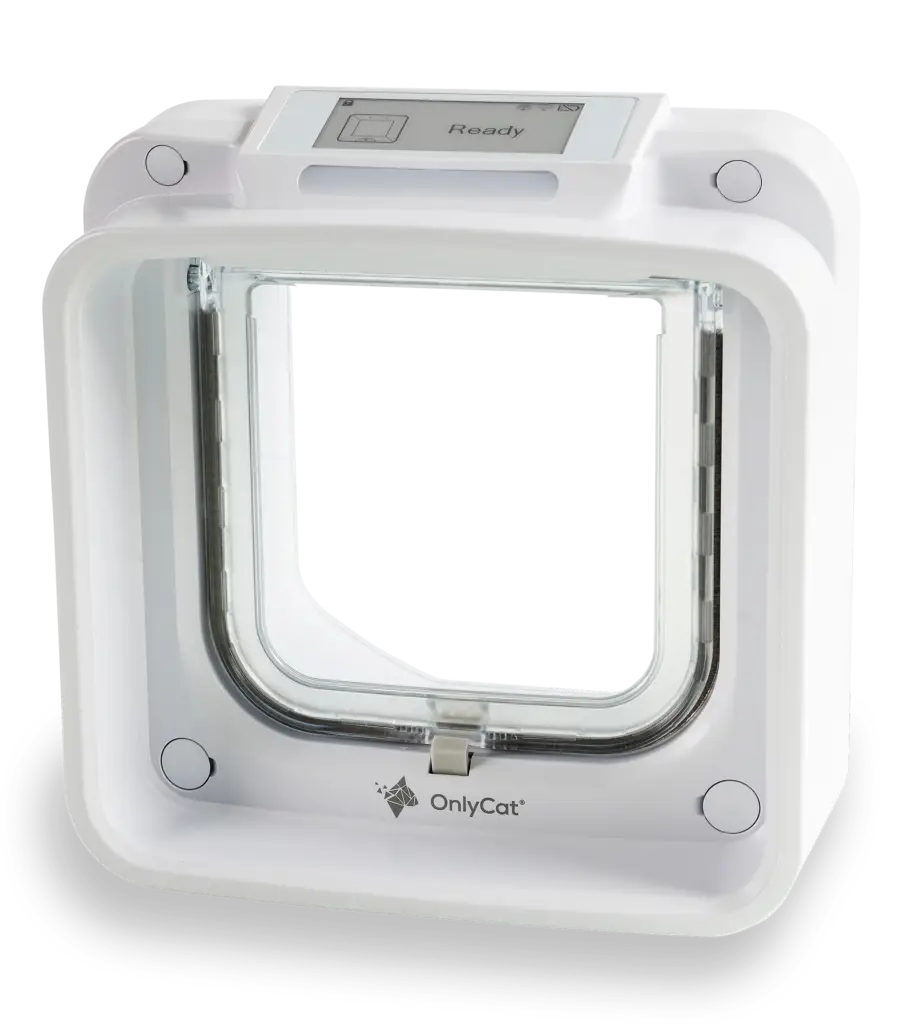
4.1 Mount the cat flap in the hole with the main body (the screen) inside the house.
4.2 Mount the external frame on the outside of the house. Depending on the thickness of the door, the tunnel may protrude through the frame by differing amounts.
Three different screw lengths have been provided for you, pick the one that most suits the thickness of your door. If you are unsure, begin with the smallest one. It is important not to use a longer screw than needed as this may damage the main front face of the cat flap.
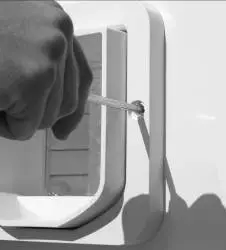
4.3 Screw the external frame to the main body.
You should not, by any circumstances, cut or drill through the tunnel as this contains the microchip reading antennas and will prevent the unit from working properly.
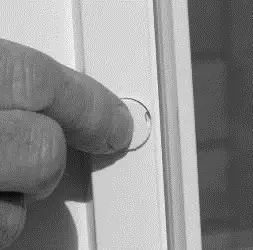
5. Add screw caps
When the cat flap has been mounted correctly, place the screw caps over the screw holes on the external frame.
Align the screw caps with the slot pointing inwards and press firmly.
If you need to remove the screw caps, slide a flat blade screwdriver into the side of the slot and lever the cap out of the hole.
6. Admire
From the inside, you will now see your cat’s stylish new entrance.
6 responses
Hi like to find out .
Can I pay with PayPal
And how fast can I get catflap to be delivered out to me
We currently sell our product through Indiegogo, which unfortunately does not currently accept PayPal.
We will be releasing our store soon which will accept PayPal, however. If you wish to sign up to our mailing list (link on the OnlyCat Home Page: ‘Sign up for Product Updates’), we will inform you as soon as it’s live.
The current estimated shipping time for orders placed today (11th Dec 2024) is February 2025, as we are currently working our way through our Indiegogo backlog.
The device requires a low voltage supply (9V, 2A) through a standard USB Power Delivery adaptor (20W or higher). OnlyCat comes with a standard adaptor to convert from UK and EU/US/AUS mains supply (110-230V AC) to USB-C (same as a standard phone charger) and a 3.0m white cable to suit.
There is a small backup battery which serves as a failsafe in the event of power loss of several minutes. This enables the device to enter a safe shutdown procedure.


6 responses
Hi like to find out .
Can I pay with PayPal
And how fast can I get catflap to be delivered out to me
We currently sell our product through Indiegogo, which unfortunately does not currently accept PayPal.
We will be releasing our store soon which will accept PayPal, however. If you wish to sign up to our mailing list (link on the OnlyCat Home Page: ‘Sign up for Product Updates’), we will inform you as soon as it’s live.
The current estimated shipping time for orders placed today (11th Dec 2024) is February 2025, as we are currently working our way through our Indiegogo backlog.
How do you recommend power is routed? None of the product pictures or descriptions depict this that I can see. This is a real issue.
Hi there,
The device requires a low voltage supply (9V, 2A) through a standard USB Power Delivery adaptor (20W or higher). OnlyCat comes with a standard adaptor to convert from UK and EU/US/AUS mains supply (110-230V AC) to USB-C (same as a standard phone charger) and a 3.0m white cable to suit.
There is a small backup battery which serves as a failsafe in the event of power loss of several minutes. This enables the device to enter a safe shutdown procedure.
Here are a couple of examples of power routing:
https://www.onlycat.com/door-installation-tips-tricks/
Many thanks 🙂
Hi
How long is the power cable you supply? I need 4 metres.will this be long enough or is there somewhere I can buy some from?
Hi,
OnlyCat is supplied with a 3m USB-C cable.
We do have a 5m USB-C cable available on our store as well as USB-C cable extenders.
Many thanks 🙂